Sooty 2.0 - Autozam AZ-3 B5ZE - rear bumper respray
-
Give your car a really good clean underneath and up in the wheel arches before you go!!
Or take it somewhere and get it steam cleaned underneath.
Make sure you take a drill and several wire brush ends for it to clean up any rusty bits before under sealing it.
And a can of quick drying undercoat to cover any bits that you have cleaned to bare metal. Plus some black quick drying topcoat for touching up wishbones etc etc…
You get the idea.
-
Haha no Sam, my other mx3s were undersealed, but it still wasn't enough. This time, cavity treated, undersealed, POR-15 painted rear subframe and around the front.
Admin, thanks :)
steam cleaned yesterday, being stored indoors to dry out until spray day
drill and wire wheel yep
zinc rich primer deruster paint stuff from dinitrol
-
just had a thought, you can get rust remover discs for grinders (not sure if they come in drill format) and they are good for any bad spots.
Also if they give you access to an air line i'd spray on the under seal, its much better than rollering it on.
Also LOTS of newspaper, masking tape, cling film and gloves!!
The cling film is great for wrapping up your suspension struts and covering the discs, brakes etc when your doing up under the wheel arches.
Masking tape is a must for getting straight lines on the outer sills. I put up my straight line then using more tape I hung sheets of newspaper from that too, so i could spray right up to the line without getting spray all over the workshop. But I found the spray was too strong so I got a mate to hold a blanket up behind the newspaper to give it more weight. That worked once we had worked out a system.
Also (probably overkill) but when we were spraying into any holes in the chassis rails we jacked up one end of the car, sprayed, then jacked up the other end and sprayed. Don't know if this made any difference or not but we were thinking it might help it run down better.
Hope it all goes well, take a good look at all the rear suspension mounts.
-
Good info! thanks :D
Yep it's all airline Dinitrol through schutz gun, also with attachable hose for shoving down cavities :)
Cling film is a brilliant idea, didn't think of that.
I've got bin bags, will get some newspaper too then.
I've a wire wheel for my grinder too, it's pretty industrial.
-
What a lonnnnnnnngggggg day in the cold! Job is done. Rust was minimal.
Neighbouring 2 stroke:

Want my own lift!

ARch holes

Front before, mmm 3" downpipe

Under before

Worst rust on the car, minor scabs, pretreated then blasted with dinitrol

half done

half two

done

mmm clean arches

Process:
steam clean
dried for 48hrs
removed arch trims skirts exhaust, exhaust shields etc
washed down with white spirit and sponge
blew air through all cavities
Dinitrol ML cavity wax all holes
Wait a bit
Mask stuff
Dinitrol thick wax all the rest
Leave to dry
Pick up Monday
-
Nice write up. Looks very good and will defo do its job proper! Lol @ Arch holes…
Would kill for a flat ramp lift too :bowdown:
-
Top job :bigok: Let me know if you're venturing south at any stage :)
-
What was the cost all in?
-
Cheers guys!
Will do Jason, any reason? Just a nosey?
Dinitrol medium car kit approx £100 but used about 40% of it so enough left for my other car
Car lift hire was about £12/hr x5hrs for my anal level of removing trim etc.
-
Yep just a poke around! :)
-
Some pics after putting the skirts back on :)


-
Great pics,Marco!!!Car looks really nice!!!! :respect: :D
-
Wicked mate lovely shots! Think black is my new favourite car colour :P
-
Coloured wheels to match ?.

-
looking good as always :cheers:
-
looking really good marco. tidier than mine. i'll have to meet up some time with you and check over my example, not as tidy as yours mind.
once i get my cooling pws pipe i shall have her back on the road, though need to adjust the ile as she sits at 1500 rpm, then when you put her into 1st it drops to 800 rpm. not sure what might be going on. might need a new clutch at some future point, need to dbl clutch for reverse sometimes.
-
Thanks Edy, would be nice to see yours updated ;)
Thanks Foxy, looks decent in photos but a nightmare to clean and keep scratch free!
Garfy, I have came close before lol.
Cheers DJ :cheers:
Spoddy, for sure! Hmm maybe ecu using neutral switch to change the revs. Reverse is straight cut gears so don't be surprised if it's awkward sometimes :)
-
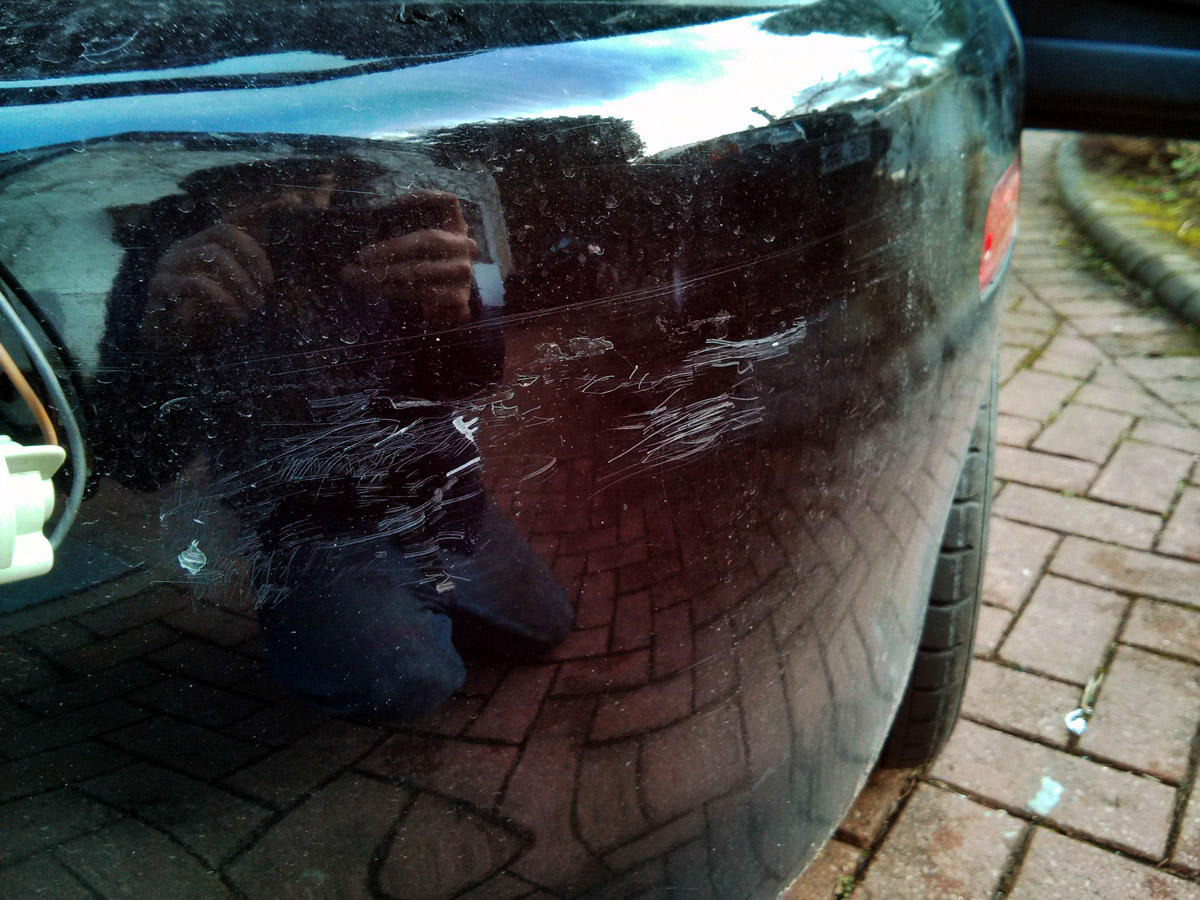
I decided the worst looking part of my car was the rear bumper. It came with the car pretty hammered with minor collision damage. Fortunately nothing frame bendingly serious.
Rough old bumper, dented and apparently painted with dulux with a yard brush, also rubber "I can't park strips":


The 'new' bumper from a certain scrap car. Had to be rubbed back down to plastic due to silicone inclusions on the last persons respray.

Rusty bracketry

Loose rust off

Dipped in magical green liquid:

Dererusted and acid etch primed, later 2k painted:

Worst bit of the cars rear:


Quick 2k new paint on the rear panel:


Shiny HKS and new paint :D

-
I like!
Nice work.
-
Great stuff dude, slowly but surely getting mint :-p
