Marco's Black Beast aka 'Sooty'
-
Fuck yeah!.. Seeing the BB at speed makes me want another one now..
-
Excellent bit of notoriety 8) Looks beastly too :)
-
everything about your car screams beast lol!, except the wonky number plate lol !, ive got a small motorbike one on front, dont know if its legal but it looks the shizzle !!.
-
That second hi-speed pic does look the shizzle 8)
-
Kind of difference have you noticed with the coil pack?
-
Also a t28 turbo from a Nissan 200sx is pretty good and cheap for a garret a s15 turbo is the same but is ball bearing instead. Just had a look at some old comments
-
Just to update I'm currently NA KLZE. I've a few ideas going on. For the short term I think I'm going to have another go at getting the ITBs working. Going to order some jenvey linkage (£128 plus VAT :o :o :o ) soon to properly link the 2 banks. Hopefully that will fix the balancing problems that plagued that project.
I have to say the sound of KLZE and an exhaust cutout is simply immense!
Bay currently:

KLZE
Megasquirt etc
Exedy standard clutch
Kf01 fly
Standard gearbox plus .717 5th
35 mpg last tank, 305miles per 39.7 litresI've also got some used Yokohama Advan A048 to try at the next drag event. See if I can beat my last NA time of 15 flat. Unfortunately the surface is poor, so we can never match POD times but I'm hoping these tyres will make up for it.
-
Get on them ITB's that sound would be eargasmic, bay looks sweet either way Bro.
-
You could always make a plenum for them. I know it kind of defeats the purpose of having ITB's but a lot of ITB setups are run that way. It would help balance them out.
-
http://www.youtube.com/watch?v=cYLKzQzhneE&feature=youtu.be
well I put the ITBs back on today. Since last time several important changes:
-Jenvey linkage between the two banks, £130 odd of precision engineering
-Adjusted the spacing so they are more perfectly inline
-gave the return springs an extra wrap to snap back down more firmly
-flattened down the flanges to seal better
-opted to use the thermoblok spacers to give more room and a longer intake tract.You can see they're idling a LOT better. Currently my carPC has been crashing a lot so I can't try and tune until I sort that :(
-
:D Rip roaring good times! :D
-
This makes me happy. But also sad that its not on my k8.
-
:respect: :respect:
-
hell yeh thats a lot smoother than last time, hope this goes well :respect:
-
sound awsome :respect:
now i realy want to try this lol
-
Nice work, sounds the nuts :respect:
-
:bowdown: :bowdown: wow
-
Oh that sound….. I want.
-
You have to do a how to for that shit as well bud…
-
About time I updated this!
Car is currently off the road. After two years of night classes, exams and interviews I got into university to study Dentistry :D In 4.5 years time I will be a lot better off and finally will have a garage to work in :lol:
Unfortunately due to the course being so intensive it leaves little time to make money, which is why my car is currently off the road. That along with paying my fees.
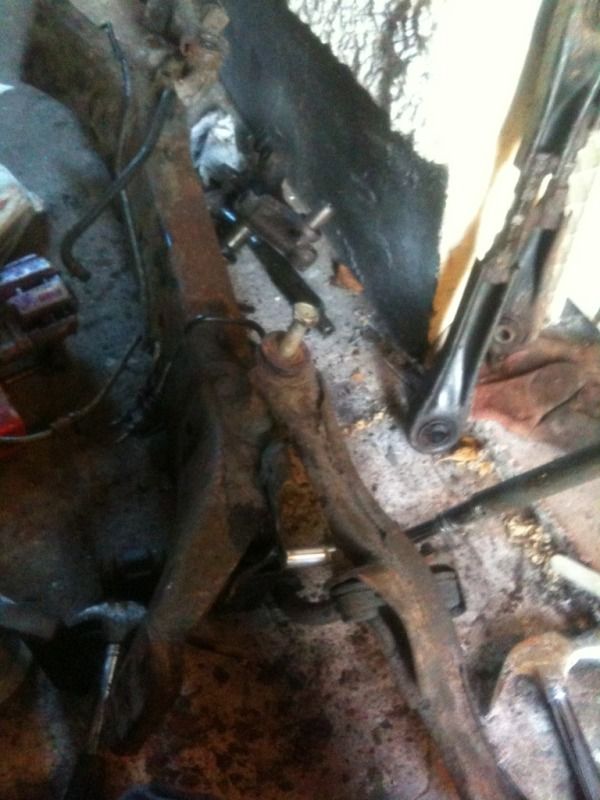
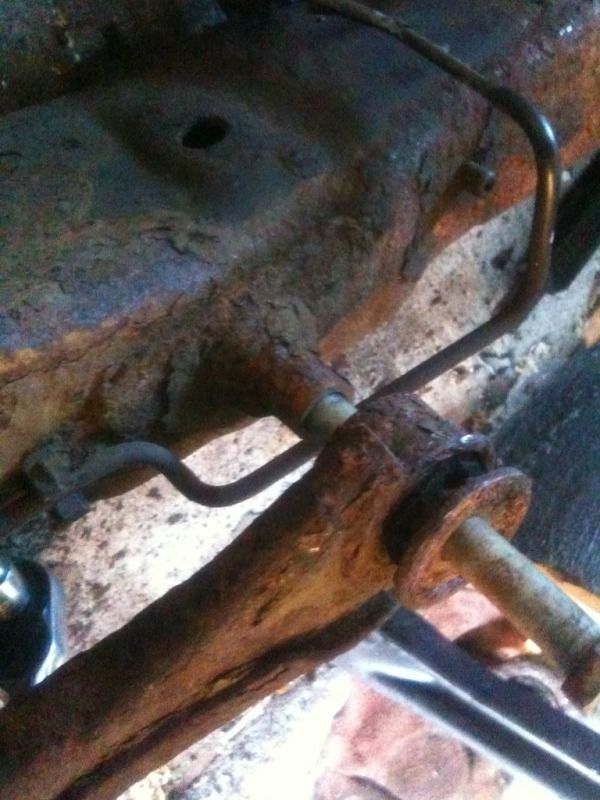
However I am battling against the rust with the intention of running LPG with NA KLZE. Both sills are rotten. Wheel arches are doing their best. I've started with the rear subframe. The caged nuts that mount the trailing arms to the body have of course rusted and spun out. I'll worry about that later, it's too cold outside to be welding under the car.
I've removed the rear subframe, surprisingly easy! Currently removing all rust. I've removed all bushings and shells via burning out and splitting the shells, so no press required, that how we do things here in Northern Ireland! I will finally get the wytbusings in. I will be redoing all brake lines with copper and goodridge braided lines.
CONTINUED….
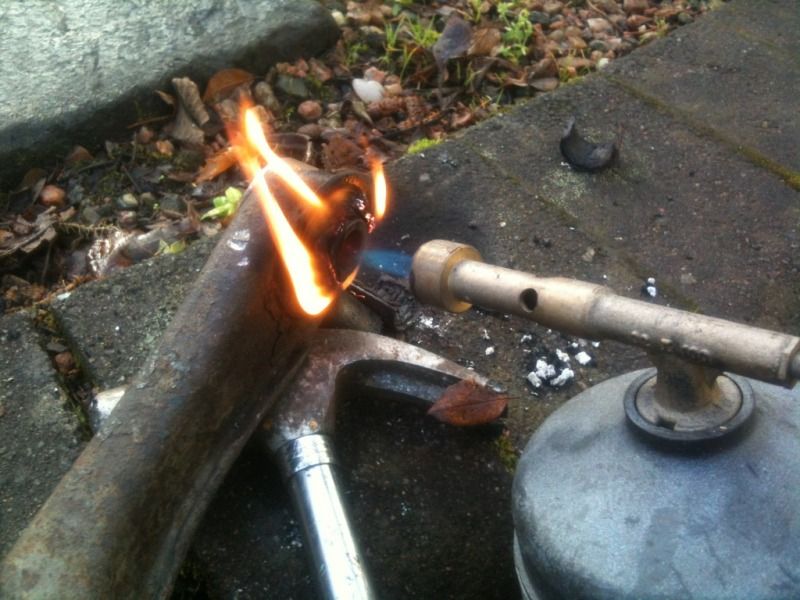
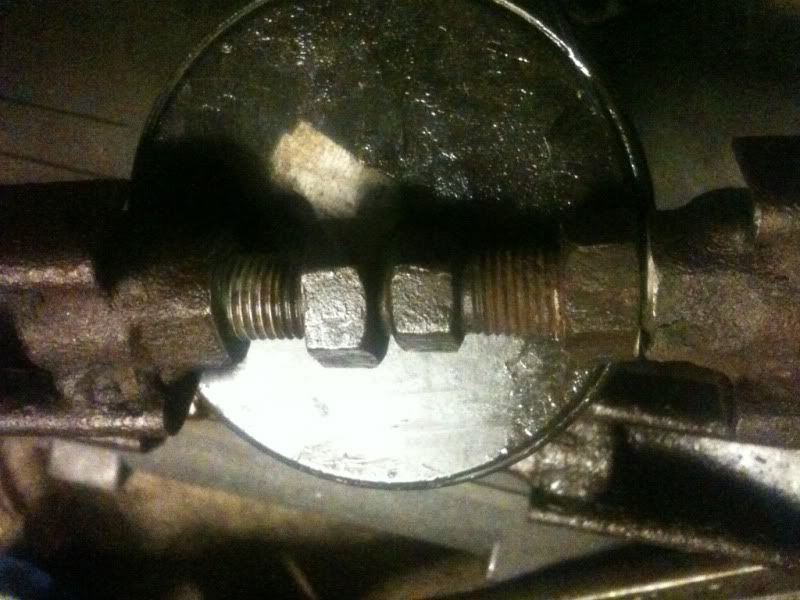
VICTORY on one :)
-lots of heat
-grinded a thin slit 360 degrees where the nut had rust welded to the arm
-hammered
-put the 14mm middle in the VICE, spanner = fail
-massive wrench on the locking nuts then flat of the arm and voila! All freed up :)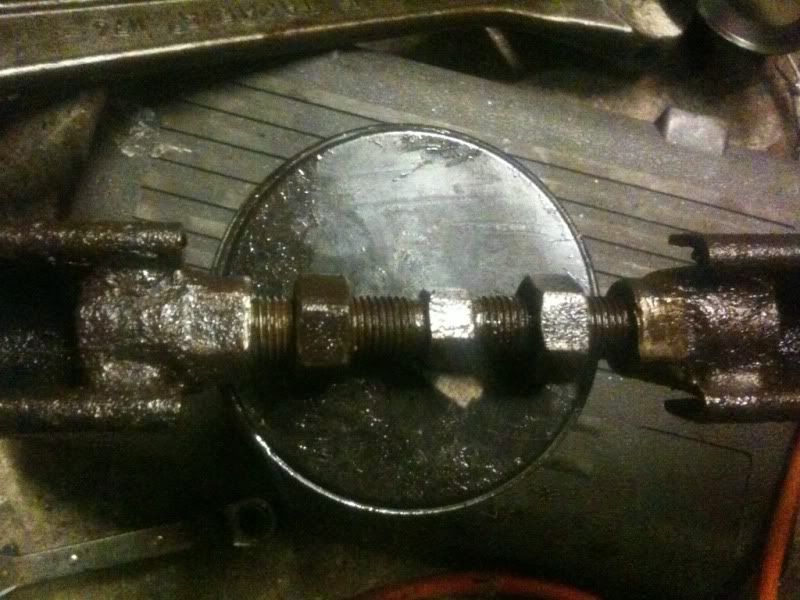
Now this one is tricky, threads will be cleaned up first with a dremel thin cutting disc before further attempts on the locking nut. The alignment/tyre shop failed to free up any of these, so I'm happy to be making any progress.
After this one the assembly should be much easier. I did have to chop one link bolt though :( I'm going to see if my 323 gtx rear subframe has a compatible bolt to steal, as that projects not happening for a while!